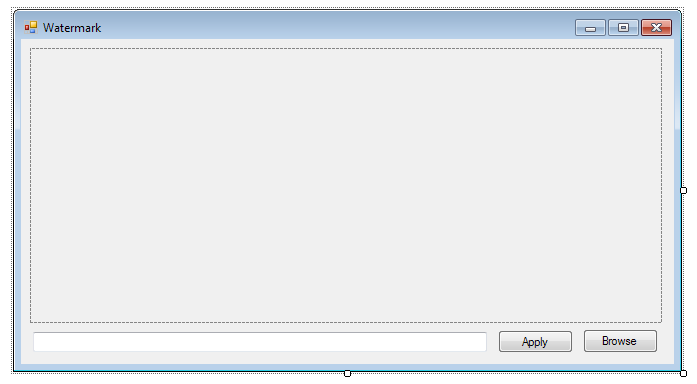
this is the look of the stopwatch
 the script add it below head
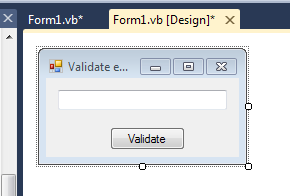
this is the form code
thanks for reading
this is the form code
thanks for reading


//Author : Mohamed Shimran
//Blog : http://www.ultimateprogrammingtutorials.blogspot.com

   public string GetIp()
        {
            System.Net.IPAddress[] IP = System.Net.Dns.GetHostAddresses(System.Net.Dns.GetHostName());
            for (int n = 0; n < IP.Length; n++)
            {
                return IP[n].ToString();
            }

        }
now you can add this code to a click event or any other events to get the ip addressprocess.start("notepad")
Sendkeys.Send("Testing 123 123 123)")
sendkeys.sendwait("^{ }")
Randomize()
Dim rand As Random
 Dim sendkey As String = "(" + rand.Next(1, 999).ToString + ")" + TextBox1.Text
 SendKeys.Send(sendkey)


'Author : Mohamed Shimran
'Blog : http://www.ultimateprogrammingtutorials.blogspot.com
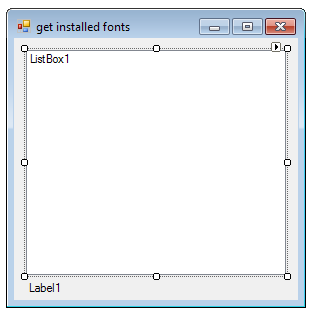
Dim links As HtmlElementCollection = WebBrowser1.Document.Links
For Each link As HtmlElement In links
ListBox1.Items.Add(link.GetAttribute("href"))
Next

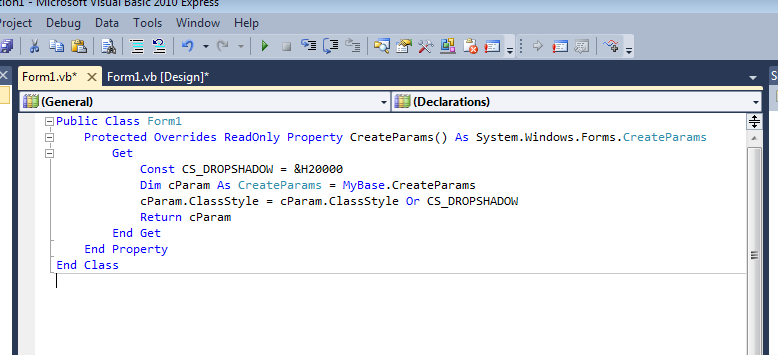
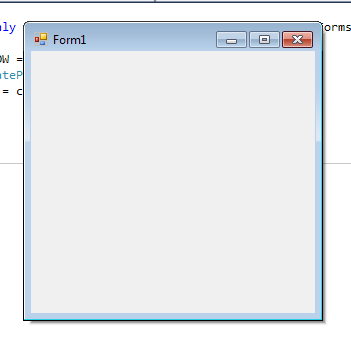
Protected Overrides ReadOnly Property CreateParams() As System.Windows.Forms.CreateParams
        Get
            Const DROPSHADOW = &H20000
            Dim cParam As CreateParams = MyBase.CreateParams
            cParam.ClassStyle = cParam.ClassStyle Or DROPSHADOW
            Return cParam
        End Get
    End Property
Public Class Form1
    'ultimate programming tutorials
    Declare Auto Function SendMessage Lib "user32.dll" (ByVal hWnd As IntPtr, ByVal msg As Integer, ByVal wParam As Integer, ByVal lParam As Integer) As Integer
    Enum ProgressBarColor
        Green = &H1
        Red = &H2
        Yellow = &H3
    End Enum
    Private Shared Sub ChangeProgBarColor(ByVal ProgressBar_Name As Windows.Forms.ProgressBar, ByVal ProgressBar_Color As ProgressBarColor)
        SendMessage(ProgressBar_Name.Handle, &H410, ProgressBar_Color, 0)
    End Sub
End Class
Public Class form1

    Private Declare Sub keybd_event Lib "user32" (ByVal bVk As Byte, ByVal bScan As Byte, ByVal dwFlags As Integer, ByVal dwExtraInfo As Integer)

    Private Const VK_CAPITAL As Integer = &H14
    Private Const VK_SCROLL As Integer = &H91
    Private Const VK_NUMLOCK As Integer = &H90

    Private Const KEYEVENTF_EXTENDEDKEY As Integer = &H1
    Private Const KEYEVENTF_KEYUP As Integer = &H2
end class

 Imports System.Drawing.Drawing2D
 Class DotNetBarTabcontrol
   Inherits TabControl
   Sub New()
     SetStyle(ControlStyles.AllPaintingInWmPaint Or ControlStyles.ResizeRedraw Or ControlStyles.UserPaint Or ControlStyles.DoubleBuffer, True)
     DoubleBuffered = True
     SizeMode = TabSizeMode.Fixed
     ItemSize = New Size(44, 136)
   End Sub
   Protected Overrides Sub CreateHandle()
     MyBase.CreateHandle()
     Alignment = TabAlignment.Left
   End Sub
   Function ToPen(ByVal color As Color) As Pen
     Return New Pen(color)
   End Function
   Function ToBrush(ByVal color As Color) As Brush
     Return New SolidBrush(color)
   End Function
   Protected Overrides Sub OnPaint(ByVal e As PaintEventArgs)
     Dim B As New Bitmap(Width, Height)
     Dim G As Graphics = Graphics.FromImage(B)
     Try : SelectedTab.BackColor = Color.White : Catch : End Try
     G.Clear(Color.White)
     G.FillRectangle(New SolidBrush(Color.FromArgb(246, 248, 252)), New Rectangle(0, 0, ItemSize.Height + 4, Height))
     'G.DrawLine(New Pen(Color.FromArgb(170, 187, 204)), New Point(Width - 1, 0), New Point(Width - 1, Height - 1))  'comment out to get rid of the borders
     'G.DrawLine(New Pen(Color.FromArgb(170, 187, 204)), New Point(ItemSize.Height + 1, 0), New Point(Width - 1, 0))          'comment out to get rid of the borders
     'G.DrawLine(New Pen(Color.FromArgb(170, 187, 204)), New Point(ItemSize.Height + 3, Height - 1), New Point(Width - 1, Height - 1)) 'comment out to get rid of the borders
     G.DrawLine(New Pen(Color.FromArgb(170, 187, 204)), New Point(ItemSize.Height + 3, 0), New Point(ItemSize.Height + 3, 999))
     For i = 0 To TabCount - 1
       If i = SelectedIndex Then
         Dim x2 As Rectangle = New Rectangle(New Point(GetTabRect(i).Location.X - 2, GetTabRect(i).Location.Y - 2), New Size(GetTabRect(i).Width + 3, GetTabRect(i).Height - 1))
         Dim myBlend As New ColorBlend()
         myBlend.Colors = {Color.FromArgb(232, 232, 240), Color.FromArgb(232, 232, 240), Color.FromArgb(232, 232, 240)}
         myBlend.Positions = {0.0F, 0.5F, 1.0F}
         Dim lgBrush As New LinearGradientBrush(x2, Color.Black, Color.Black, 90.0F)
         lgBrush.InterpolationColors = myBlend
         G.FillRectangle(lgBrush, x2)
         G.DrawRectangle(New Pen(Color.FromArgb(170, 187, 204)), x2)
         G.SmoothingMode = SmoothingMode.HighQuality
         Dim p() As Point = {New Point(ItemSize.Height - 3, GetTabRect(i).Location.Y + 20), New Point(ItemSize.Height + 4, GetTabRect(i).Location.Y + 14), New Point(ItemSize.Height + 4, GetTabRect(i).Location.Y + 27)}
         G.FillPolygon(Brushes.White, p)
         G.DrawPolygon(New Pen(Color.FromArgb(170, 187, 204)), p)
         If ImageList IsNot Nothing Then
           Try
             If ImageList.Images(TabPages(i).ImageIndex) IsNot Nothing Then
               G.DrawImage(ImageList.Images(TabPages(i).ImageIndex), New Point(x2.Location.X + 8, x2.Location.Y + 6))
               G.DrawString("   " & TabPages(i).Text, Font, Brushes.DimGray, x2, New StringFormat With {.LineAlignment = StringAlignment.Center, .Alignment = StringAlignment.Center})
             Else
               G.DrawString(TabPages(i).Text, New Font(Font.FontFamily, Font.Size, FontStyle.Bold), Brushes.DimGray, x2, New StringFormat With {.LineAlignment = StringAlignment.Center, .Alignment = StringAlignment.Center})
             End If
           Catch ex As Exception
             G.DrawString(TabPages(i).Text, New Font(Font.FontFamily, Font.Size, FontStyle.Bold), Brushes.DimGray, x2, New StringFormat With {.LineAlignment = StringAlignment.Center, .Alignment = StringAlignment.Center})
           End Try
         Else
           G.DrawString(TabPages(i).Text, New Font(Font.FontFamily, Font.Size, FontStyle.Bold), Brushes.DimGray, x2, New StringFormat With {.LineAlignment = StringAlignment.Center, .Alignment = StringAlignment.Center})
         End If
         G.DrawLine(New Pen(Color.FromArgb(200, 200, 250)), New Point(x2.Location.X - 1, x2.Location.Y - 1), New Point(x2.Location.X, x2.Location.Y))
         G.DrawLine(New Pen(Color.FromArgb(200, 200, 250)), New Point(x2.Location.X - 1, x2.Bottom - 1), New Point(x2.Location.X, x2.Bottom))
       Else
         Dim x2 As Rectangle = New Rectangle(New Point(GetTabRect(i).Location.X - 2, GetTabRect(i).Location.Y - 2), New Size(GetTabRect(i).Width + 3, GetTabRect(i).Height + 1))
         G.FillRectangle(New SolidBrush(Color.FromArgb(246, 248, 252)), x2)
         G.DrawLine(New Pen(Color.FromArgb(170, 187, 204)), New Point(x2.Right, x2.Top), New Point(x2.Right, x2.Bottom))
         If ImageList IsNot Nothing Then
           Try
             If ImageList.Images(TabPages(i).ImageIndex) IsNot Nothing Then
               G.DrawImage(ImageList.Images(TabPages(i).ImageIndex), New Point(x2.Location.X + 8, x2.Location.Y + 6))
               G.DrawString("   " & TabPages(i).Text, Font, Brushes.DimGray, x2, New StringFormat With {.LineAlignment = StringAlignment.Center, .Alignment = StringAlignment.Center})
             Else
               G.DrawString(TabPages(i).Text, Font, Brushes.DimGray, x2, New StringFormat With {.LineAlignment = StringAlignment.Center, .Alignment = StringAlignment.Center})
             End If
           Catch ex As Exception
             G.DrawString(TabPages(i).Text, Font, Brushes.DimGray, x2, New StringFormat With {.LineAlignment = StringAlignment.Center, .Alignment = StringAlignment.Center})
           End Try
         Else
           G.DrawString(TabPages(i).Text, Font, Brushes.DimGray, x2, New StringFormat With {.LineAlignment = StringAlignment.Center, .Alignment = StringAlignment.Center})
         End If
       End If
     Next
     e.Graphics.DrawImage(B.Clone, 0, 0)
     G.Dispose() : B.Dispose()
   End Sub
 End Class
myBlend.Colors = {Color.FromArgb(232, 232, 240), Color.FromArgb(232, 232,
240), Color.FromArgb(232, 232, 240)}
myBlend.Positions = {0.0F, 0.5F, 1.0F}
myBlend.Colors = New Color() {Color.FromArgb(232, 232, 240), Color.FromArgb(232, 232, 240), Color.FromArgb(232, 232, 240)}
myBlend.Positions = New Single() {0.0F, 0.5F, 1.0F}

'by mavamaarten
Public Class MetroSlideControl
Inherits TabControl
Dim OldIndex As Integer
Private _Speed As Integer = 15
Property Speed As Integer
Get
Return _Speed
End Get
Set(ByVal value As Integer)
If value > 20 Or value < -20 Then
MsgBox("Speed needs to be in between -20 and 20.")
Else
_Speed = value
End If
End Set
End Property
Sub New()
SetStyle(ControlStyles.AllPaintingInWmPaint Or ControlStyles.OptimizedDoubleBuffer Or ControlStyles.ResizeRedraw, True)
End Sub
Sub DrawPanel(ByVal Panel As Panel)
Dim bitmap As New Bitmap(Panel.Width, Panel.Height)
Panel.DrawToBitmap(bitmap, New Rectangle(0, 0, Panel.Width, Panel.Height))
CreateGraphics.DrawImage(bitmap, New Point(0, 0))
End Sub
Sub DoAnimationScrollLeft(ByVal Control1 As Control, ByVal Control2 As Control)
Dim G As Graphics = Control1.CreateGraphics()
Dim P1 As New Bitmap(Control1.Width, Control1.Height)
Dim P2 As New Bitmap(Control2.Width, Control2.Height)
Control1.DrawToBitmap(P1, New Rectangle(0, 0, Control1.Width, Control1.Height))
Control2.DrawToBitmap(P2, New Rectangle(0, 0, Control2.Width, Control2.Height))
For Each c As Control In Control1.Controls
c.Hide()
Next
Dim Slide As Integer = Control1.Width - (Control1.Width Mod _Speed)
Dim a As Integer
For a = 0 To Slide Step _Speed
G.DrawImage(P1, New Rectangle(a, 0, Control1.Width, Control1.Height))
G.DrawImage(P2, New Rectangle(a - Control2.Width, 0, Control2.Width, Control2.Height))
Next
a = Control1.Width
G.DrawImage(P1, New Rectangle(a, 0, Control1.Width, Control1.Height))
G.DrawImage(P2, New Rectangle(a - Control2.Width, 0, Control2.Width, Control2.Height))
SelectedTab = Control2
For Each c As Control In Control2.Controls
c.Show()
Next
For Each c As Control In Control1.Controls
c.Show()
Next
End Sub
Protected Overrides Sub OnSelecting(ByVal e As System.Windows.Forms.TabControlCancelEventArgs)
If OldIndex < e.TabPageIndex Then
DoAnimationScrollRight(TabPages(OldIndex), TabPages(e.TabPageIndex))
Else
DoAnimationScrollLeft(TabPages(OldIndex), TabPages(e.TabPageIndex))
End If
End Sub
Protected Overrides Sub OnDeselecting(ByVal e As System.Windows.Forms.TabControlCancelEventArgs)
OldIndex = e.TabPageIndex
End Sub
Sub DoAnimationScrollRight(ByVal Control1 As Control, ByVal Control2 As Control)
Dim G As Graphics = Control1.CreateGraphics()
Dim P1 As New Bitmap(Control1.Width, Control1.Height)
Dim P2 As New Bitmap(Control2.Width, Control2.Height)
Control1.DrawToBitmap(P1, New Rectangle(0, 0, Control1.Width, Control1.Height))
Control2.DrawToBitmap(P2, New Rectangle(0, 0, Control2.Width, Control2.Height))
For Each c As Control In Control1.Controls
c.Hide()
Next
Dim Slide As Integer = Control1.Width - (Control1.Width Mod _Speed)
Dim a As Integer
For a = 0 To -Slide Step -_Speed
G.DrawImage(P1, New Rectangle(a, 0, Control1.Width, Control1.Height))
G.DrawImage(P2, New Rectangle(a + Control2.Width, 0, Control2.Width, Control2.Height))
Next
a = Control1.Width
G.DrawImage(P1, New Rectangle(a, 0, Control1.Width, Control1.Height))
G.DrawImage(P2, New Rectangle(a + Control2.Width, 0, Control2.Width, Control2.Height))
SelectedTab = Control2
For Each c As Control In Control2.Controls
c.Show()
Next
For Each c As Control In Control1.Controls
c.Show()
Next
End Sub
Public Sub NextPage()
If SelectedIndex < TabPages.Count - 1 Then SelectedIndex += 1
End Sub
Public Sub PreviousPage()
If SelectedIndex > 0 Then SelectedIndex -= 1
End Sub
Protected Overrides Sub WndProc(ByRef m As Message)
If m.Msg = &H1328 Then
m.Result = CType(1, IntPtr)
Else
MyBase.WndProc(m)
End If
End Sub
End Class
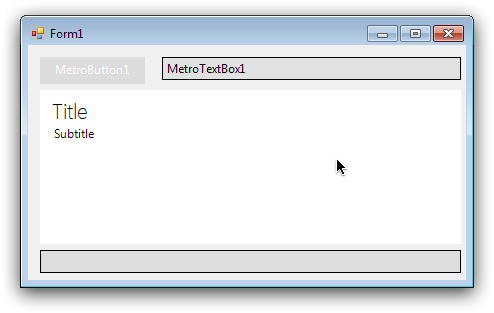
Public Class MetroPanel
Inherits Panel
Private _TitleText As String = "Title"
Property Title As String
Get
Return _TitleText
End Get
Set(ByVal value As String)
_TitleText = value
Invalidate()
End Set
End Property
Private _SubTitleText As String = "Subtitle"
Property SubTitle As String
Get
Return _SubTitleText
End Get
Set(ByVal value As String)
_SubTitleText = value
Invalidate()
End Set
End Property
Private _TitleFont As Font = New Font("Segoe UI Light", 16)
Property TitleFont As Font
Get
Return _TitleFont
End Get
Set(ByVal value As Font)
_TitleFont = value
End Set
End Property
Private _SubTitleFont As Font = New Font("Segoe UI", 9)
Property SubTitleFont As Font
Get
Return _SubTitleFont
End Get
Set(ByVal value As Font)
_SubTitleFont = value
End Set
End Property
Private _DrawBorders As Boolean
Property DrawBorders As Boolean
Get
Return _DrawBorders
End Get
Set(ByVal value As Boolean)
_DrawBorders = value
Invalidate()
End Set
End Property
Private _BorderColor As Color
Property BorderColor As Color
Get
Return _BorderColor
End Get
Set(ByVal value As Color)
_BorderColor = value
End Set
End Property
Sub New()
BackColor = Color.White
End Sub
Protected Overrides Sub OnPaint(ByVal e As System.Windows.Forms.PaintEventArgs)
Dim G As Graphics = e.Graphics
G.Clear(BackColor)
G.DrawString(_TitleText, _TitleFont, New SolidBrush(ForeColor), New Point(8, 5))
G.DrawString(_SubTitleText, _SubTitleFont, New SolidBrush(ForeColor), New Rectangle(12, 35, Width - 25, Height - 50))
If DrawBorders Then
G.DrawRectangle(New Pen(_BorderColor), New Rectangle(0, 0, Width - 1, Height - 1))
End If
MyBase.OnPaint(e)
End Sub
End Class
Public Class MetroButton
Inherits Control
Enum MouseState
None = 0
Over = 1
Down = 2
End Enum
Private State As MouseState = MouseState.None
Dim _BGOver As Color '= Color.FromArgb(75, 75, 75)
Property BackColorOver As Color
Get
Return _BGOver
End Get
Set(ByVal value As Color)
_BGOver = value
Invalidate()
End Set
End Property
Dim _BGDown As Color '= Color.FromArgb(55, 55, 55)
Property BackColorDown As Color
Get
Return _BGDown
End Get
Set(ByVal value As Color)
_BGDown = value
Invalidate()
End Set
End Property
Dim _BorderColor As Color
Property BorderColor As Color
Get
Return _BorderColor
End Get
Set(ByVal value As Color)
_BorderColor = value
Invalidate()
End Set
End Property
Dim BGC As Color
Property BackColorNormal As Color
Get
Return BGC
End Get
Set(ByVal value As Color)
BGC = value
End Set
End Property
Sub New()
ForeColor = Color.White
Font = New Font("Segoe UI", 9)
SetStyle(ControlStyles.OptimizedDoubleBuffer, True)
DoubleBuffered = True
Dim R, G, B As Integer
Dim BG As Color = BackColor
R = BG.R - 20
G = BG.G - 20
B = BG.B - 20
If R < 0 Then R = 0
If G < 0 Then G = 0
If B < 0 Then B = 0
BGC = Color.FromArgb(R, G, B)
Size = New Size(105, 27)
End Sub
Protected Overrides Sub OnBackColorChanged(ByVal e As System.EventArgs)
Dim R, G, B As Integer
R = BackColor.R - 20
G = BackColor.G - 20
B = BackColor.B - 20
If R < 0 Then R = 0
If G < 0 Then G = 0
If B < 0 Then B = 0
BGC = Color.FromArgb(R, G, B)
R = BGC.R - 10
G = BGC.G - 10
B = BGC.B - 10
If R < 0 Then R = 0
If G < 0 Then G = 0
If B < 0 Then B = 0
_BGDown = Color.FromArgb(R, G, B)
R = BGC.R + 10
G = BGC.G + 10
B = BGC.B + 10
If R > 255 Then R = 255
If G > 255 Then G = 255
If B > 255 Then B = 255
_BGOver = Color.FromArgb(R, G, B)
R = BGC.R - 50
G = BGC.G - 50
B = BGC.B - 50
If R < 0 Then R = 0
If G < 0 Then G = 0
If B < 0 Then B = 0
_BorderColor = Color.FromArgb(R, G, B)
MyBase.OnBackColorChanged(e)
End Sub
Protected Overrides Sub OnMouseEnter(ByVal e As System.EventArgs)
State = MouseState.Over
Invalidate()
MyBase.OnMouseEnter(e)
End Sub
Protected Overrides Sub OnMouseLeave(ByVal e As System.EventArgs)
State = MouseState.None
Invalidate()
MyBase.OnMouseLeave(e)
End Sub
Protected Overrides Sub OnMouseDown(ByVal e As System.Windows.Forms.MouseEventArgs)
State = MouseState.Down
Invalidate()
MyBase.OnMouseDown(e)
End Sub
Protected Overrides Sub OnMouseUp(ByVal e As System.Windows.Forms.MouseEventArgs)
State = MouseState.Over
Invalidate()
MyBase.OnMouseUp(e)
End Sub
Protected Overrides Sub OnPaint(ByVal e As System.Windows.Forms.PaintEventArgs)
Dim G As Graphics = e.Graphics
Select Case State
Case MouseState.None
G.Clear(BGC)
Case MouseState.Over
G.Clear(BackColorOver)
Case MouseState.Down
G.Clear(BackColorDown)
End Select
G.DrawRectangle(New Pen(_BorderColor), New Rectangle(0, 0, Width - 1, Height - 1))
Dim SF As New StringFormat : SF.Alignment = StringAlignment.Center : SF.LineAlignment = StringAlignment.Center
G.DrawString(Text, Font, New SolidBrush(ForeColor), New Rectangle(0, 0, Width - 1, Height - 1), SF)
MyBase.OnPaint(e)
End Sub
End Class
Public Class MetroTextBox
Inherits Control
Private _TextAlign As HorizontalAlignment = HorizontalAlignment.Left
Property TextAlign() As HorizontalAlignment
Get
Return _TextAlign
End Get
Set(ByVal value As HorizontalAlignment)
_TextAlign = value
If Base IsNot Nothing Then
Base.TextAlign = value
End If
End Set
End Property
Private _MaxLength As Integer = 32767
Property MaxLength() As Integer
Get
Return _MaxLength
End Get
Set(ByVal value As Integer)
_MaxLength = value
If Base IsNot Nothing Then
Base.MaxLength = value
End If
End Set
End Property
Private _ReadOnly As Boolean
Property [ReadOnly]() As Boolean
Get
Return _ReadOnly
End Get
Set(ByVal value As Boolean)
_ReadOnly = value
If Base IsNot Nothing Then
Base.ReadOnly = value
End If
End Set
End Property
Private _UseSystemPasswordChar As Boolean
Property UseSystemPasswordChar() As Boolean
Get
Return _UseSystemPasswordChar
End Get
Set(ByVal value As Boolean)
_UseSystemPasswordChar = value
If Base IsNot Nothing Then
Base.UseSystemPasswordChar = value
End If
End Set
End Property
Private _Multiline As Boolean
Property Multiline() As Boolean
Get
Return _Multiline
End Get
Set(ByVal value As Boolean)
_Multiline = value
If Base IsNot Nothing Then
Base.Multiline = value
If value Then
Base.Height = Height - 11
Else
End If
End If
End Set
End Property
Overrides Property Text As String
Get
Return MyBase.Text
End Get
Set(ByVal value As String)
MyBase.Text = value
If Base IsNot Nothing Then
Base.Text = value
End If
End Set
End Property
Overrides Property Font As Font
Get
Return MyBase.Font
End Get
Set(ByVal value As Font)
MyBase.Font = value
If Base IsNot Nothing Then
Base.Font = value
Base.Location = New Point(3, 5)
Base.Width = Width - 6
End If
End Set
End Property
Protected Overrides Sub OnParentChanged(ByVal e As System.EventArgs)
If Not Controls.Contains(Base) Then
Controls.Add(Base)
End If
End Sub
Private Base As TextBox
Dim C As Color
Sub New()
Font = New Font("Segoe UI", 9)
Base = New TextBox
Base.Font = Font
Base.Text = Text
Base.MaxLength = _MaxLength
Base.Multiline = _Multiline
Base.ReadOnly = _ReadOnly
Base.UseSystemPasswordChar = _UseSystemPasswordChar
Base.BorderStyle = BorderStyle.None
Base.Location = New Point(5, 4)
Base.Width = Width - 10
If _Multiline Then
Base.Height = Height - 11
End If
AddHandler Base.TextChanged, AddressOf OnBaseTextChanged
AddHandler Base.KeyDown, AddressOf OnBaseKeyDown
Dim R, G, B As Integer
R = BackColor.R - 15
G = BackColor.G - 15
B = BackColor.B - 15
If R < 0 Then R = 0
If G < 0 Then G = 0
If B < 0 Then B = 0
C = Color.FromArgb(R, G, B)
Base.BackColor = C
End Sub
Protected Overrides Sub OnBackColorChanged(ByVal e As System.EventArgs)
MyBase.OnBackColorChanged(e)
Dim R, G, B As Integer
R = BackColor.R - 15
G = BackColor.G - 15
B = BackColor.B - 15
If R < 0 Then R = 0
If G < 0 Then G = 0
If B < 0 Then B = 0
C = Color.FromArgb(R, G, B)
Base.BackColor = C
Invalidate()
End Sub
Protected Overrides Sub OnPaint(ByVal e As System.Windows.Forms.PaintEventArgs)
Dim GG As Graphics = e.Graphics
GG.Clear(C)
GG.DrawRectangle(Pens.Black, New Rectangle(0, 0, Width - 1, Height - 1))
End Sub
Private Sub OnBaseTextChanged(ByVal s As Object, ByVal e As EventArgs)
Text = Base.Text
End Sub
Private Sub OnBaseKeyDown(ByVal s As Object, ByVal e As KeyEventArgs)
If e.Control AndAlso e.KeyCode = Keys.A Then
Base.SelectAll()
e.SuppressKeyPress = True
End If
End Sub
Protected Overrides Sub OnResize(ByVal e As EventArgs)
Base.Location = New Point(5, 4)
Base.Width = Width - 10
If _Multiline Then
Base.Height = Height - 11
End If
MyBase.OnResize(e)
End Sub
End Class
Public Class MetroProgressbar
Inherits Control
Dim _BorderColor As Color = Color.Black
Property BorderColor As Color
Get
Return _BorderColor
End Get
Set(ByVal value As Color)
_BorderColor = value
Invalidate()
End Set
End Property
Dim _ProgressColor As Color = Color.FromArgb(10, 150, 40)
Property ProgressColor As Color
Get
Return _ProgressColor
End Get
Set(ByVal value As Color)
_ProgressColor = value
Invalidate()
End Set
End Property
Sub New()
SetStyle(ControlStyles.OptimizedDoubleBuffer Or ControlStyles.AllPaintingInWmPaint, True)
DoubleBuffered = True
End Sub
Dim _Val As Integer = 0
Property Value As Integer
Get
Return _Val
End Get
Set(ByVal v As Integer)
If v <= _Max Then _Val = v Else Throw New Exception("The entered value is not valid.")
Invalidate()
End Set
End Property
Dim _Max As Integer = 100
Property Maximum As Integer
Get
Return _Max
End Get
Set(ByVal value As Integer)
If value >= _Val Then _Max = value Else Throw New Exception("The entered value is not valid.")
End Set
End Property
Protected Overrides Sub OnPaint(ByVal e As System.Windows.Forms.PaintEventArgs)
Dim G As Graphics = e.Graphics
Dim Progress As Double = (_Val / _Max) * (Width - 2)
G.Clear(BackColor)
G.FillRectangle(New SolidBrush(Color.FromArgb(20, Color.Black)), New Rectangle(0, 0, Width - 1, Height - 1))
If Progress > 0 Then G.FillRectangle(New SolidBrush(_ProgressColor), New Rectangle(1, 1, Progress, Height - 2))
G.DrawRectangle(New Pen(_BorderColor), New Rectangle(0, 0, Width - 1, Height - 1))
MyBase.OnPaint(e)
End Sub
End Class
rails new blogthen we use scaffolding to create a post scafflod and connect to the database.
cd blog
rails generate scaffold Post title:string content:text
rake db:migrate
then we add the bootstrap to the application, open the Gemfile in the blog forder, and add the gem.
group :assets do
    gem 'twitter-bootstrap-rails'
end
then we run the command to install the gem.
bundle installand it is time to use the bootstrap make the application look beautiful.
rails generate bootstrap:install static
rails g bootstrap:layout application fixed -f
rails g bootstrap:themed Posts -f
at last, you have to open the web server
rails serverNow, just enjoy you blog application in your web browser through http://localhost:3000/posts
using System;
using System.Collections.Generic;
using System.Linq;
using System.Text;
using System.Diagnostics;
//Author : Mohamed Shimran
//Blog : http://www.ultimateprogrammingtutorials.blogspot.com
namespace Launch_Application
{
class Program
{
static void Main()
{
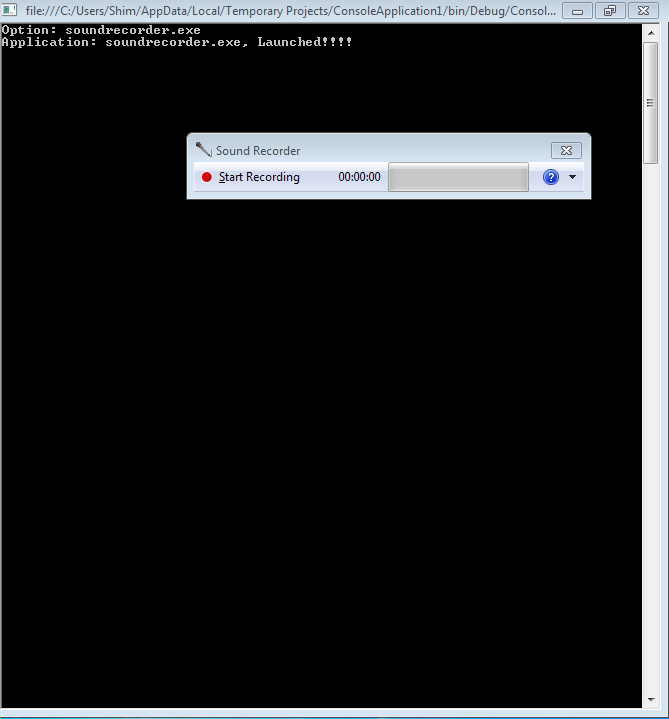
String txtApp;
Console.Write("Option: ");
txtApp = Console.ReadLine();
try
{
Process.Start(txtApp);
Console.WriteLine("Application: " + txtApp + ", Launched!!!!");
}
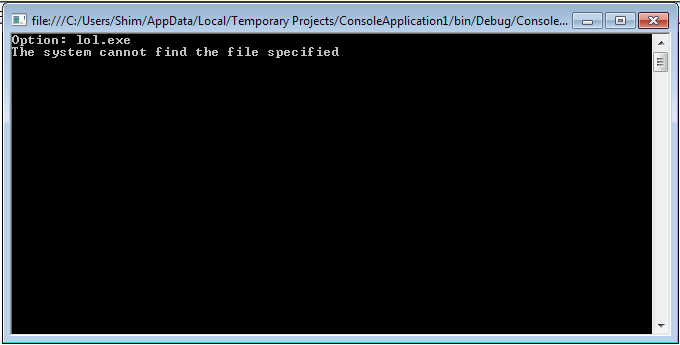
catch (Exception ex)
{
Console.WriteLine(ex.Message);
}
Console.Read();
}
}
}
using System;

namespace simple_console_application

{
        class Program

        {
                      static void Main(string[] args)

                {
                        string shim = "";

                        Console.Write("Enter a 6 digit Number: ");

                        shim = Console.ReadLine();

                        Console.WriteLine("First digit: {0}", shim.Substring(0,1));

                        Console.WriteLine("Second digit: {0}", shim.Substring(1, 1));

                        Console.WriteLine("Third digit: {0}", shim.Substring(2,1));

                        Console.WriteLine("Fourth digit: {0}", shim.Substring(3,1));

                        Console.WriteLine("Fifth digit: {0}", shim.Substring(4,1));

                        Console.WriteLine("Sixth digit: {0}", shim.Substring(5, 1));

                        Console.ReadKey();
                }

        }
}Random random = new Random(); int num = random.Next(1, 100000);it generate numbers between 1 - 100000 , you can also change them . if you want to generate numbers between 1 - 500
Random random = new Random(); int num = random.Next(1, 500);just a simple change
private void button1_Click(object sender, EventArgs e)
{
Random random = new Random();
int num = random.Next(1, 100000);
label1.Text = Convert.ToString(num);
}
you can even use a textbox instead label
#define readkey
using System;

namespace m7tr1x
{
    class Program
    {
        static void Main(string[] args)
        {
            Console.Title = "Matrix";
            Console.ForegroundColor = ConsoleColor.DarkGreen;
            Console.WindowLeft = Console.WindowTop = 0;
            Console.WindowHeight = Console.BufferHeight = Console.LargestWindowHeight;
            Console.WindowWidth = Console.BufferWidth = Console.LargestWindowWidth;
#if readkey
            Console.WriteLine("Press Any Key to Continue");
            Console.ReadKey();
#endif
            Console.CursorVisible = false;
            int width, height;
            int[] y;
            int[] l;
            Initialize(out width, out height, out y, out l);
            int ms;
            while (true)
            {
                DateTime t1 = DateTime.Now;
                MatrixStep(width, height, y, l);
                ms = 10 - (int)((TimeSpan)(DateTime.Now - t1)).TotalMilliseconds;
                if (ms > 0)
                    System.Threading.Thread.Sleep(ms);
                if (Console.KeyAvailable)
                    if (Console.ReadKey().Key == ConsoleKey.F5)
                        Initialize(out width, out height, out y, out l);
            }
        }

        static bool thistime = false;

        private static void MatrixStep(int width, int height, int[] y, int[] l)
        {
            int x;
            thistime = !thistime;
            for (x = 0; x < width; ++x)
            {
                if (x % 11 == 10)
                {
                    if (!thistime)
                        continue;
                    Console.ForegroundColor = ConsoleColor.White;
                }
                else
                {
                    Console.ForegroundColor = ConsoleColor.DarkGreen;
                    Console.SetCursorPosition(x, inBoxY(y[x] - 2 - (l[x] / 40 * 2), height));
                    Console.Write(R);
                    Console.ForegroundColor = ConsoleColor.Green;
                }
                Console.SetCursorPosition(x, y[x]);
                Console.Write(R);
                y[x] = inBoxY(y[x] + 1, height);
                Console.SetCursorPosition(x, inBoxY(y[x] - l[x], height));
                Console.Write(' ');
            }
        }

        private static void Initialize(out int width, out int height, out int[] y, out int[] l)
        {
            int h1;
            int h2 = (h1 = (height = Console.WindowHeight) / 2) / 2;
            width = Console.WindowWidth - 1;
            y = new int[width];
            l = new int[width];
            int x;
            Console.Clear();
            for (x = 0; x < width; ++x)
            {
                y[x] = r.Next(height);
                l[x] = r.Next(h2 * ((x % 11 != 10) ? 2 : 1), h1 * ((x % 11 != 10) ? 2 : 1));
            }
        }

        static Random r = new Random();
        static char R
        {
            get
            {
                int t = r.Next(10);
                if (t <= 2)
                    return (char)('0' + r.Next(10));
                else if (t <= 4)
                    return (char)('a' + r.Next(27));
                else if (t <= 6)
                    return (char)('A' + r.Next(27));
                else
                    return (char)(r.Next(32, 255));
            }
        }

        public static int inBoxY(int n, int height)
        {
            n = n % height;
            if (n < 0)
                return n + height;
            else
                return n;
        }
    }
}


