How to Turn a Static Website Into a WordPress Theme?


Still a number of business owners are running a static HTML website. But when it comes to making changes in the static site, it becomes mandatory for the website owner to have HTML programming knowledge. So, if you lack coding skills you must migrate your static site to a dynamic platform. WordPress is a highly popular dynamic platform and its popularity is not going to abate too soon. You don't have to throw all your HTML and CSS files away when moving to WP platform. Rather you can convert your HTML files to WordPress.

When converting HTML files to Wordpress theme, generally WP default theme named TwentyThirteen is being used. To carry out the conversion you'll need a copy of HTML as well as CSS files for your current site, which will be later converted to WP theme format. There are various choices you get in terms of the program, which is used to make edits in your file. Well, you can choose text-editors such as Notepad and Notepad++ or rather use Dreamweaver instead. For this purpose, you can take up HTML to Wordpress Service.

Here's a step-by-step procedure following which you'll be able to Convert HTML to Wordpress Theme.

Step 1: Creation of Files and Folders

Begin with creating a new folder on your system’s desktop. Next, give a name to the folder. Choosing an easy to remember name won't let you forget where the folder is saved, such as the name of your WPTheme. Once you've named your folder create two files namely style.css and index.php, and add both these files to the newly built folder.

In order to make your WordPress platform recognize the files you've just created, make sure to create a comment block for the style.css file including the information like theme name, URI, a brief description, version, author and author URI.

Later, verify whether the TwentyThirteen theme is set to be your active WP theme or not. Subsequently, in the WP admin panel go to Appearance and then the Editor. Open your style.css file and copy the content from it, and paste it into the newly built style.css file.

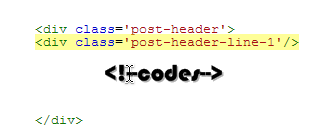
Step 2: Create new PHP files

To Convert HTML to Wordpress Theme in the second step you'll need to open WP theme editor, wherein your existing theme will be segregated into different parts – the header, footer, sidebar and main index. You can make use of the same components for building some other WP themed site. For doing so, you'll need to divide the components into different PHP files. Next, all you need to do is to copy of the code of each HTML section and place them in their respective PHP files.

Get logged in your WP admin panel. Open the theme editor followed by the file in which you want to copy the code. For instance, open header.php file of your static website; copy the code and then paste it into the newly crafted header.php file. Follow the same procedure for rest of the files.

Step 3: Use Newly Created PHP files to fetch data

To bring in data from newly crafted PHP files, open the index.php file in your WP theme folder saved on your desktop. Add PHP code to your file top and just after the tag, as show below:


Now you have constructed your own WP theme. But wait! Your theme is developed, but you may find it to be blank. You'll have to add content to it.

Step 4: Add your content

Now you may have to add content in your theme. How will you display the content in your tailor-made WP theme? For this purpose, you require WordPress’ loop function – The Loop.

Installing the loop function, requires copying the following code into your index.php template.


Step 5: Initiate your Theme

To set-up your theme, visit a FTP client and sign in to your website directory.

Go to wp-content>>themes folder.

Upload your new theme folder to this folder. Open your WordPress admin panel, go to Appearance>>themes tab. Your theme will now be visible just click on Activate.

That's it, you are done!

About Author:

Sarah Parker is a developer comes technical writer at Designs2HTML Ltd. She loves to share relevant and useful tutorials on WordPress markup conversions on Twitter to treat technical professionals with required stuffs.

How To Fix Bad Image Quality in Blogger

How To Fix Bad Image Quality in Blogger

I have been with this issue for a longtime but I never minded it, I thought Google automatically compress the images that are being uploaded to picasa web album via blogger and images from Google plus. This is something we do not notice or we don't care but it looks really ugly when some cover images are in bad quality.

So fixing is not big deal, all you got to do is make sure you are logged into your Google account that you use Blogger, then go to your Google + profile( example : +Mohamed Shimran ) from the left sidebar menu select settings , in settings page scroll down until you reach Photos and Videos :

How To Fix Bad Image Quality in Blogger

Now you can see a sub section name Auto Enhance, that's the option/feature that reduces your image quality. In default it is set to Normal so just tick off then your changes will be saved automatically.

How To Fix Bad Image Quality in Blogger

Congratulations, now your problem has been solved. Please leave your comments and share this useful article on your social networks.

Guest Blogging Vs. Article Marketing: The Contest Heats Up

Guest Blogging Vs. Article Marketing: The Contest Heats Up

Internet searchers channel out all articles holding copied substance. Most article indexes characteristic posts that have been distributed on handfuls and even many different locales. Along these lines, the substance distributed in article catalogues is not exceptional. Then again, guest blogging includes composing a totally extraordinary post for another person site or website. Provided that you distribute your article on a trustworthy website, you will get several quality backlinks.

About Guest Blogging and Article Marketing
Both procedures include composing substance that will be posted on another person site. Despite what system you utilize, you will be permitted to embed a connection to your site into the asset box. In the vicinity of 99% of the locales and writes that permit guest posts won't permit an article that has been distributed someplace else some time recently. The coming of programmed tameness programming has made many spamming catalogues with in excess of six billion duplicates of a revamped article. Guest blogging has far less spamming.

A portion of the fundamental profits of article marketing are:
  • Free publicizing 
  • Increased activity 
  • Online systems administration and introduction 
  • Relevant backlinks 
  • Link prominence
Quality articles that get grabbed from registries and republished on different sites can carry you relentless activity and increment the amount of connections indicating your site. Guest blogging has very nearly the same profits as article marketing. Some SEO specialists accept that guest posting creates higher quality interfaces than article accommodation. Furthermore, guest posting can help you build validity online and get new bookworms for your website or site.

The competition: going on for since the dawn of the internet
Throughout the last couple of years, the adequacy of article indexes has diminished because of copy substance. Numerous webmasters submit low quality articles just for getting a backlink. When you offer to compose a guest post, the web journal manager will oblige you to give high calibre content. This third party referencing strategy can help you get focused on movement and subscribers, secure yourself as a compelling voice in your corner, and pick up presentation on the Internet.

Guest posting pounds article marketing hands. While both routines work, guest blogging is an improved method for building pertinent connections and advertising your online business. In the event that you need quicker brings about terms of SEO, you can utilize different methodologies within expansion to guest posting. Everything comes to what amount of time you are ready to contribute commercial how hard you are ready to work.

Getting more individuals to read your sites or your articles are evidences that you are well known in the field that you are in. Prevalence can accelerate more movement and therefore your site's prosperity.

There are clashing thoughts on which can get you more famous, yet you could make certain that doing both you can truly realize this. Blogging and article marketing can give you more excellent arrive at and all the more well known in the specialty market you are in.

In article marketing, the catalogues you are submitting your articles to, regularly won't permit pictures or steer connections to different destinations. You can influence your article substance from your articles to the websites you posted and you might see much more stupendous effects. Investigating on web journals in your specialty can give you more thoughts for substance in your articles.

Harold J is a professional guest blogger. He loves to write tips and tricks on how to write guest post to get better search engine ranking.

How To Make Videos Responsive with CSS

How To Make Videos Responsive with CSS

A responsive website means It will respond to your browser sizes or I can browser stretches. The basic idea of it is to give optimal viewing experience to visitors, nowadays you will rarely see a unresponsive website. If you remember a Jquery snippet I posted about detecting browser real time size It is also responsive. So basically in order to make websites responsive on load you need a meta tag that helps you to stretch/resize the elements of your website but It's not required for this tutorial.

So for this tutorial, only videos with iframe, embed or objects works. You can get the iframe code of any videos from popular websites like YouTube, DailyMotion, Vimeo, MetaCafe etc.

Let's make our style, here's the css we need(if you are a beginner make sure you put the codes within <style>) :

 .Responsive-Video {
    position: relative;
    padding-bottom: 56.25%;
    padding-top: 30px;
    height: 0;
    overflow:
    hidden;
}
   
.Responsive-Video iframe, .Responsive-Video object, .Responsive-Video embed {
    position: absolute;
    top: 0;
    left: 0;
    width: 100%;
    height: 100%;
}


So after adding the css to your web page, add your video embed code within the div class given below(I know this is NOOB! )  :

<div class="Responsive-Video">

    </div>


Example :

<div class="Responsive-Video">
    <iframe width="760" height="720" src="http://www.youtube.com/embed/Mu4ARzSZOmg" frameborder="0" allowfullscreen></iframe>
    </div>


Screenshot : 

YouTube Responsive Video

If you're using Blogger or Wordpress you can just add the css code within the body and whenever you post a video in your post you can add the embed code within the div class.

How To Add Delicious Save Button To Blogger/WordPress

Delicious Logo

Delicious is a social bookmarking website that helps you to store, share and discover links. It was created by Joshua Schachter and later it was sold to AVOS Systems. Delicious provides browser extension, boomarklet and save buttons to make it easy to bookmark your links. It also enables you to save the links you post on your Twitter, Facebook and Google+. When you save links manually you can tag your link and give it a description and a title. It has a Following system like twitter.

I have been using their service for almost one month, all I can say is It’s a good service for you to store your important links other than that sharing your link doesn’t help you at all. Whenever I go to their Discover page I see links with Chinese title(GRRR!)

So in order to add a Delicious Link Save button to your blog, they have provided a HTML code in their tools page. Then you can just copy and paste the code in your template wherever you want it display. Oh wait you have to replace your-company in the code( your company name(if you have) or else you can just give your blog name.


..and save your template. Please don’t hesitate to ask me if you have any questions.

Under Construction Template for Blogger

Under construction templates are rarely released for Blogger. I had some issues with my other blog template so I had to put up a under construction template, I was searching for hours to find a good template somehow after navigating many sites I found one that has everything I wanted. So I decided to share it.

The template I am writing about has everything that a under construction template should have. you can set the construction time so the time will keep running and then you have twitter, facebook and RSS buttons where you can just link your social links and finally we have a Feedburner subscription thing that you can use to let your feed subscribers know when you publish your new design.

Under Construction Template for Blogger


Template Details
    • Template Name - Launcher
    • Author - NewBloggerThemes
    • Designer - MyThemeShop
    • Released Date - 19-April-2013
    • Category - Under Contruction

      Configuration/Installation

      1. Go to Template > Edit HTML in your blogger.
      2. Search for TargetDate (to get the search box in EditHTML press CTRL + F)
      You will find this Javascript :

      In that change the TargetDate value "04/19/2015 10:00 AM" to the date you gonna publish your new design(template).

      3. Search for id='social', you will end up finding these lines :


      In those lines replace your social links with the existed ones(ie : http://twitter.com/newbthemes)

      4. Now finally we have to configure Feedburner(just search for Feedbuner).


      Replace newbthemes with your Feedburner ID

      5. Save your Template.

      I hope you enjoyed this article! please share it with your friends :)

      The Evolution of Music and Video Content Consumption

      The Evolution of Music and Video Content Consumption

      Question: How many ways are there to consume music today?
      Answer: More than you can guess. The way we consume content, including music, has undergone a few changes in the past decade or so. As recently as the years between 2000 and 2005, we connected to the Internet at a speed of about 56 kbps. Today, Internet connection speeds average about 2.6 mbps. What seemed like the greatest thing since sliced bread in 2000 would seem so frustratingly slow that today’s users would be utterly appalled by the length of time it took to load a single web page. Thanks to the speed at which we can connect to the world at large, we’re consuming a great deal of content in new ways.

      Desktop PCs, while still used in business and office settings, as well as many homes, are often a last resort to mobile users. We prefer to connect on the go, without being chained to a desk, using devices such as smartphones and tablets. We’re consuming the majority of our content today digitally. Whether it’s music, video, news or even books—we turn to the World Wide Web first. Take a look at the infographic below for more details on how content consumption has evolved over the past 10 to 15 years.

      TorchBrowser is a free and unique software that offers you powerful browsing together with built-in media downloading and sharing features.

      5 Steps To Marketing Your Law Blog

      5 Steps To Marketing Your Law Blog Even if you are not an ardent internet user, you don’t have to be told that blogging is one of the most effective ways to market your law firm today. You may not enjoy blogging as much as some others do, but it is absolutely necessary for you to ensure that you have an active blog if you want to get your firm’s name out there.

      A common mistake made by legal professionals is underestimating the whole blogging process. Here are a few tips on how to effectively develop and market your blog:

      Decide your approach:
      Before you start your law blog, you should decide on what type of approach you’d like to use for your blog. Do you want to write about law in general or would you prefer to write about a specific area of law? If you are a law firm specializing in a particular field of law, then you should concentrate your efforts in providing information in this field. This will establish you as a professional in this area and you will attract a specific niche of readers interested in this area of law.

      Professional or do it yourself
      Your next task is to determine if you would like to hire a professional to provide you with articles for your law blog or you’d prefer to write the articles yourself. Hiring a professional will mean that you get professionally done articles at regular intervals. Your blog will therefore have fresh content every so often. Writing the articles yourself will mean that you can share your own personal experiences and therefore give the blog an even more personal touch. You can also opt to combine the two. Have some articles done professionally and provide some of your own personal articles for the blog. You’ll therefore always have fresh information on your blog and keep your readers hooked.

      Linking your blog:
      Link your blog to your law firm’s website and other social networking accounts. Ensure that updates are provided on these accounts whenever you post new information on your blog. Ask your friends and family to connect to your social networking accounts so that they can get updates as well. You can also request them to share any interesting information from your blog on their social networks. This is a great way to get your law firm’s name out there.

      Submitting to directories:
      Submit your blog to a blog directory. There are countless directories to which you can submit your blog and get it out there. It is best to submit the blog to a law specific directory such as blawg.com. However, even general directories have law specific categories that your blog will be placed under. Simply ensure that you submit to popular directories that have high ratings with internet users.

      Connecting with other bloggers:
      Connect with other law bloggers and comment on their blogs. This is a great way to get recognition as an expert. Be sure to include a link to your blog in your signature. Those reading your comments may be curious to find out more about you and your law firm and follow the links that you provide. Marketing your blog is equal to marketing your firm. Invest the resources required to get the best out of blogging.

      Melissa Trowbridge is marekting professional from Atlanta, Georgia. She specializes in promotions for law firms and legal services companies.

      How To Add LinkedIn Share Button To Blogger

      in logo
      LinkedIn is one of the largest social network(mostly it's used for business purposes), It was founded in 2002, launched in 2003 may now it has millions of users. LinkedIn has introduced share button for websites(including blogs) to make it easy to share Articles on LinkedIn. There are 3 types of LinkedIn share buttons available(with counters).
      You can read the full history and it's rankings from wikipedia


      The types are : Horizontal Count, Vertical count & No count.
      LinkedIn Buttons Buddy


      To add the button you like to your blogger blog, follow these steps

      1 : Go to Dashboard -> Template -> Edit HTML

      2 : Press CTRL+F and search for <div class='post-header-line-1'/>

      3 : Add the codes of the button you like(see the below image)

      <!--code-->
      Horizontal Count
      Codes :
      <b:if cond='data:blog.pageType == "item"'>
      <div style='float:left;margin-left:2px;'>
      <script src='http://platform.linkedin.com/in.js' type='text/javascript'/><script data-counter='right' expr:data-url='data:post.url' type='in/share'/>
      </div>
      </b:if>

      Preview :
      Horizontal count


      Vertical Count

      Codes :
      <b:if cond='data:blog.pageType == &quot;item&quot;'>
        <div style='float:right;margin-left:2px;margin-bottom:2px;'>
      <script src='http://platform.linkedin.com/in.js' type='text/javascript'/><script data-counter='top' expr:data-url='data:post.url' type='in/share'/>
      </div>
      </b:if>
      Preview :
      Vertical Count


      No Count
      Codes :
      <b:if cond='data:blog.pageType == &quot;item&quot;'>
        <div style='float:left;'>
      <script src='http://platform.linkedin.com/in.js' type='text/javascript'/><script expr:data-url='data:post.url' type='in/share'/>
      </div>
      </b:if>
      Preview :
      No count


      NOTE : You can also add this button at <data:post.body/>

      4 : Finally save your template & that's it.


      NOTE : You can also change Margin sizes & Alignment(float)


      I recommend you to use the Horizontal Count because i am using it & I think that's the one that suits for any blog.

      How To Add 125x125 Ad Banners To Blogger

      One of the main ad banner is 125x125, we can see 125x125 ad banners on many websites. Without wasting time let's get into it.....
      • Go to Blogger > Design > Page elements
      • Click on add a widget
      • Select HTML/JavaScript Widget
      • Add the codes below in it
      • Replace Ad URL with the website link of the advertiser 
      • Replace Ad Image URL with the ad image link Replace 
      • Ad Description with some information about the Advertisement, the description appears as ALT(mouse hover) 
      • Finally save the HTML/JavaScript Widget
      I hope this tutorial is useful, keep visiting for more tutorials.

      Widget to share photos,text & page

      media

      The best way to get traffic for your blog is from search engines and social media. Today I found a social media sharing service very impressive and attractive. Let me introduce to the service, there's a website called markely.com that promotes your blog visitors to share your blog articles in three ways.


      1 : Page Sharing
      page share
      2 : Image Sharing
      image share

      3 : Text Sharing
      text sharing


      To install this service on your blog go to http://www.markerly.com/onboarding

      Choose Social Media services + Sharing Types + Icon Color
      social media
      Sign up
      sign up
      Get your code
      codes scripts
      Put the code at </body> or somewhere in your template
      </body tags
      Verify your installation
      verify install
      They have a dashboard where you can see the sharing stats & etc, I hope this is helpful. Have a great day.

      How To Edit/Change Comments In Blogger

      This is my first blogger tutorial, sometimes we get spammy comments/offending comments and etc for our posts and if we delete the comment that is something not nice so what we can do is, we can just edit the posted comment easily.

      First of you need to go to setting>other in your blogger control panel and click on Export blog.


      How To Make a Website Responsive

      mobile of UP
      Being a blogger or a webmaster everyone want's to make their website compatible with any device. Not everyone know this small one line code that makes your website fit with mobile/tablet etc devices size.

      All you need to do is just add this one line code under your head.

      <meta content='width=device-width, initial-scale=1, maximum-scale=1' name='viewport'/>

      head
      After adding it, save your template and let's check if it works, go to http://www.studiopress.com/responsive/ and enter your website URL & hit enter, within seconds you would be able to see how your website looks like and if it fits for other devices.

      Theres another way to check it, just resize your webbrowser
      resize,sizse
      As you can see it works, Thanks for reading I hope this helps you.

      How To Add A Top Bar To Blogger

      logo
      We are going to use a service a popular one it's called AddThis . AddThis provide many services such as sharing widgets and recommended posts widget etc and we are going to use Welcome Bar . Go to addthis.com and create a new account or if you already have an account log on to your account.

      Now go to https://www.addthis.com/get/welcome#.UemQQ9JgdeY and create your Welcome Bar . Design the bar as well
      Design Welcome Bar AddThis
      Finally get the code right after that designing place , this is my code(don't use this code)


      Place that javascript below head or between body tags then as you have settled your Welcome Bar , it will appear. Thanks For Reading .

      Syntax Highlighter For Blogger

      Syntax
      I have been using Alex Gorbatchev Syntax Highlighter for a long while now . someone requested me to write an article about using this syntax highlighter in blogger so here i go .

      Select a theme for the syntax highlighter , those links have previews of the theme.
      Now add these codes under your head in your html .


      After adding those codes now it's time to set your theme to the syntax highlighter , in the third line of code that i gave before . this parameter is what i meant

      code
      now after styles/ add the theme style , you can see the theme style right after the theme preview link . for example i have selected shThemeRDark.css then my parameter would look like this

      line


      Now you have successfully added the syntax highlighter now save your template and now we will test the syntax highlighter . you cannot just add the code and let it define the language , you should define the language in the tag . you can see what language we can highlight from here  . coming to the point i will show you how to syntax highlight a java hello world program .

      go to the HTML tab in your post and find where you want the syntax highlighter to be and here we go
      replace ____ with your language name and replace codes with your codes and that's how it works . here is a sample of the syntax highlighter.
      public class HelloWorld {
      
          public static void main(String[] args) {
              System.out.println("Hello World");
          }
      
      }
      Thanks For Reading , Have A Great day .